The web content management infrastructure in SharePoint 2013 includes a number of significant improvements targeted at search engine optimization for publishing sites. Major features such as cross-site publishing and managed navigation have been definitely getting a lot of attention but there are also smaller and less known features that can also be very useful.
Page SEO Properties
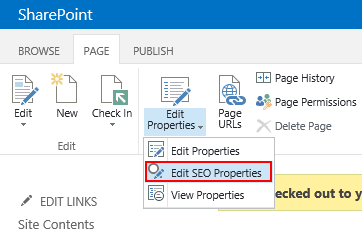
The Page content type in SharePoint 2013 has a number of fields dedicated to search engine optimization. You can populate these fields by selecting the Edit SEO Properties menu item in the SharePoint ribbon while editing a page.
On the Edit SEO Properties page, you can set the following field values:
Name – the page name to appear in search results. Defines the “canonical” url of the page. (Note: for term-driven pages, this maps to the Friendly Url Segment term property)
Title – the page title to appear in search results. Defines the HTML title tag value of the page. (Note: for term-driven pages, this maps to the Navigation Node Title term property)
Browser Title – if set, overrides the browser page title and HTML title tag value above.
Meta Description – short summary of page content. Search engines may display this in search results. Defines the “description” meta tag content of the page.
Meta Keywords – keywords that describe the content of the page. Defines the “keywords” meta tag content of the page.
Exclude from Internet Search Engines – indicates to search engines if this page content should be indexed or not. If the page is to be excluded, adds a noindex robots meta tag to the page.
SharePoint Cross-Site Publishing and Search Engine Optimization
The SEO Properties above work great for standard publishing pages but what if you are using cross-site publishing to display content on the publishing site? It turns out that you can also control the Browser Title, Meta Description and Meta Keywords tag content through search. The Catalog-Item Reuse web part that is typically used to display information on catalog item pages will use the following managed property values to generate meta tags for the page:
SeoBrowserTitleOWSTEXT – value will be used to populated the <title> tag
SeoKeywordsOWSTEXT – will populate the “keywords” meta tag
SeoDescriptionOWSTEXT – will set the “description” meta tag content
Basically, all you need to do is to map the crawled properties associated with your site columns to the managed properties above, run a full crawl and the meta tag will magically appear on your catalog item pages!
In order for us to be able to use different Product and ProductModel external content type fields, we need to create a number of managed properties. For this example, the following managed properties need to be created:
Navigate to Central Administration > Manage service applications > Search Service Application
Click the Search Schema link in the Queries and Results side navigation section
Click New Managed Property to create a new managed property for each of the items below
Now let’s confirm that managed navigation is enabled and configured on the SharePoint site. It is enabled for new publishing sites by default in SharePoint 2013.
Navigate to Site Settings > Look and Feel > Navigation
Make sure that Managed Navigation is selected for both Global Navigation and Current Navigation
Pages
We’ll need to create 3 new pages on the site – one top-level page listing all product models, one page that will list all products for a product model, and one page to display product details.
The first page has to be created by using the Site Actions > Add a page option so that SharePoint automatically creates and configures the navigation term.
Create a new page called Products by going to Site Actions > Add a page
Navigate to the Pages document library on the site
Create a new page called Product by using the New Document option in the ribbon
Create a new page called Product-Model by using the New Document option in the ribbon
Managed Navigation
Now is the time to configure the managed navigation to use the pages created earlier.
Navigate to Site Settings > Site Administration > Term store management
Expand the Site Collection node
Expand the Site Navigation node
Select the Products term
Select the Term-Driven Pages tab
Change target page for children of this term
Change Catalog Item Page for this category and Change Catalog Item Page for children of this category to use the Product.aspx page
Press Save to commit the changes
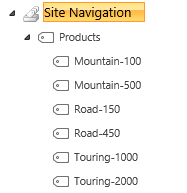
Add a child term to the Products navigation term for each of the product model. No settings need to be customized for the child terms.
Mountain-100
Mountain-500
Road-150
Road-450
Touring-1000
Touring-2000
The navigation term set should now looks similar to this:
Content By Search
The final steps is to add and configure content search web parts to the pages we created earlier.
Click the Products link in the global navigation to navigate to the Products.aspx page
Edit the page and add a Content Search web part from the Content Rollup category
Edit web part properties
Press Change Query to bring up the Query Builder user interface
On the Basics tab, switch to Advanced Mode, select ProductModel result source in the dropdown and clear the Query text
Press OK to close the query builder
Change the Number of items to show to 6
In the Display Templates section, select Two lines as the Item display template
In the Property Mappings section, select ProductModelSummary as Line 2
Press OK to apply changes and save the page
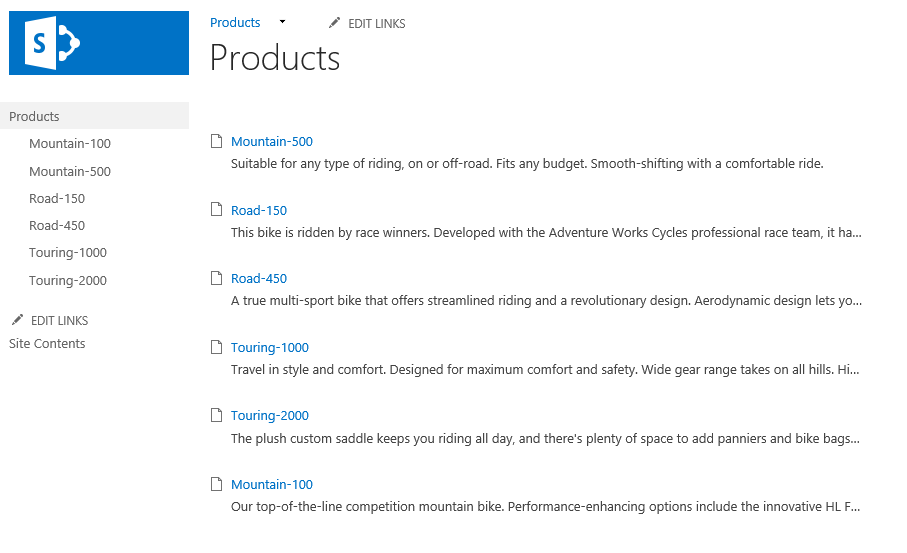
The Products page should now look like this:
Next, click one of the links on the page to navigate to the product model page.
Edit Product-Model.aspx page
Add a Content Search web part from the Content Rollup category
Edit web part properties
Press Change Query to bring up the Query Builder user interface
On the Basics tab, switch to Advanced Mode, select Product result source in the dropdown
Set Query text to productmodel:{Term.Name}
Press OK to close the query builder
Change the Number of items to show to 10
In the Display Templates section, select Two lines as the Item display template
Press OK to apply changes and save the page
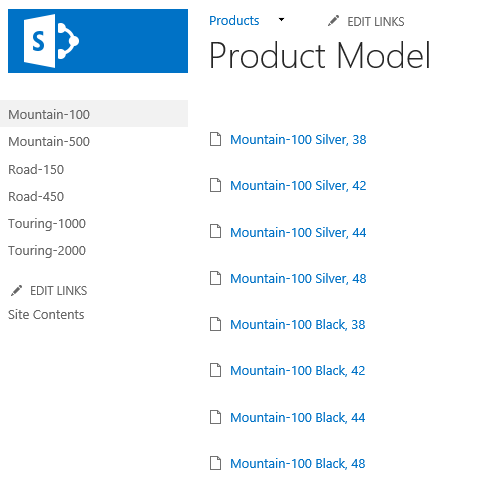
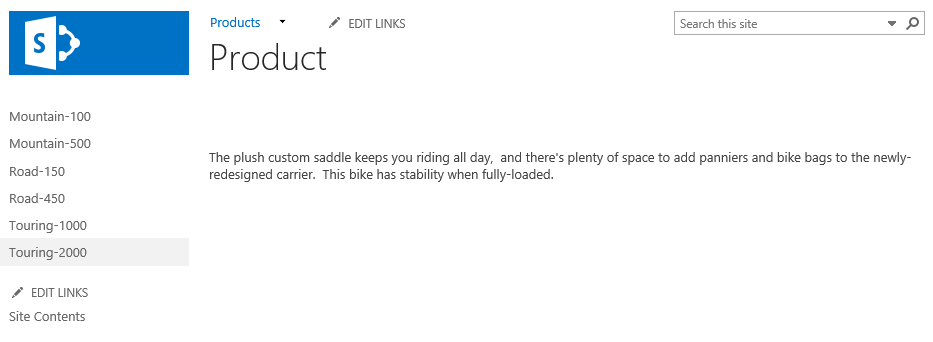
Your Product Model page should now look similar to this screenshot:
Now follow one of the links on the page to navigate to the product detail page.
Edit Product.aspx page
Add Catalog-Item Reuse web part from the Search-Driven Content category
Edit web part properties
Press Change Query to bring up the Query Builder user interface
On the Basics tab, switch to Advanced Mode, select Product result source in the dropdown
Set Query text to productid:{URLToken.1}
Press OK to close the query builder
In the Property Mappings section, select ProductDescription managed property
You have a SharePoint publishing site with a number of pages that display dynamic content based on a query string. You followed a process similar to Crawling Publishing Sites in SharePoint 2010 to configure SharePoint search to index the dynamic page content. Now you’d like to enrich the items in the search index with additional metadata that can be used for property restriction queries or for adding custom refiners.
Solution
Add dynamically generated META tag to the page. SharePoint will automatically create a crawled property of type Text under in the Web category using the name attribute of the META tag as the crawled property name. You can then map the crawled property to a new managed property that will get its value populated with the content attribute value of the META tag.
Example
I’ll use the web part and pages created in my previous blog post and will simply extend the web part to generate a META tag.
[ToolboxItemAttribute(false)]
public class ProductInformation : WebPart
{
    protected override void CreateChildControls()
    {
        // get the model number from query string
        string modelNumber = Page.Request.QueryString["ModelNumber"];
        if (!string.IsNullOrEmpty(modelNumber))
        {
            // assign a product category based on the model number
            string productCategory = string.Empty;
            switch (modelNumber)
            {
                case "M300":
                case "M400":
                case "M500":
                case "X200":
                case "X250":
                    productCategory = "Digital Camera";
                    break;
                case "X300":
                case "X358":
                case "X400":
                case "X458":
                case "X500":
                    productCategory = "Digital SLR";
                    break;
            }

            // set the page title
            ContentPlaceHolder contentPlaceHolder = (ContentPlaceHolder)Page.Master.FindControl("PlaceHolderPageTitle");
            contentPlaceHolder.Controls.Clear();
            contentPlaceHolder.Controls.Add(new LiteralControl() { Text = string.Format("{0} {1}", modelNumber, productCategory) });

            // add the model number and product category to the page as an H2 heading
            Controls.Add(new LiteralControl() { Text = string.Format("<h2>{0} {1}</h2>", modelNumber, productCategory) });

            // generate a META tag
            Page.Header.Controls.Add(new HtmlMeta() { Name = "modelnumber", Content = modelNumber });
        }
    }
}
If we refresh one of the product information pages after deploying the code change above, we should be able to see the META tag in the page source.
<meta name="modelnumber" content="M300" />
Now run a full crawl and then verify that the crawled property was created by going to Central Administration > Search Service Application > Metadata Properties > Crawled Properties (for SharePoint Search) or to Central Administration > Query SSA > FAST Search Administration > Crawled property categories > Web (for FAST Search).
Next, create a new managed property of type Text and add a mapping to the crawled property above. If using FAST Search, also check the Query property and Refiner property checkboxes.
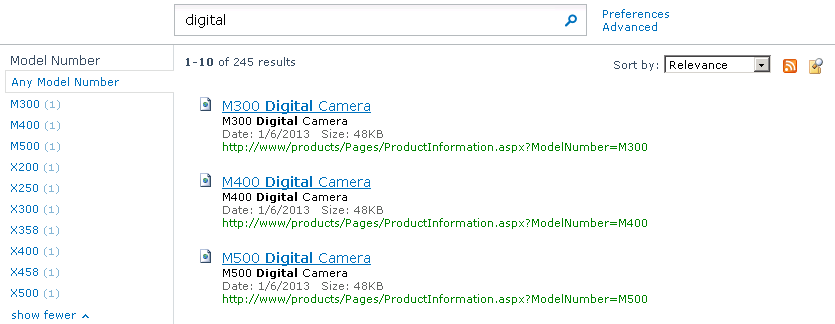
Run another full crawl and the managed property is now ready to be used for property restriction queries or as a refiner.
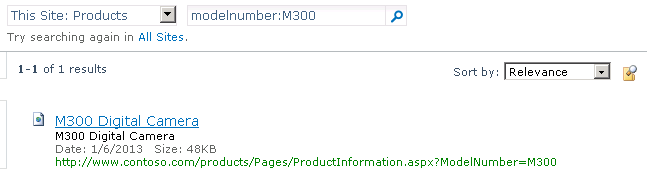
Let’s test it by running the following query first:
You have a publishing site with a number of pages that use web parts to display dynamic content based on a query string parameter value. You crawl the site using the SharePoint connector but all you can find is the static page content – the dynamic content generated by the web parts is not searchable.
Solution
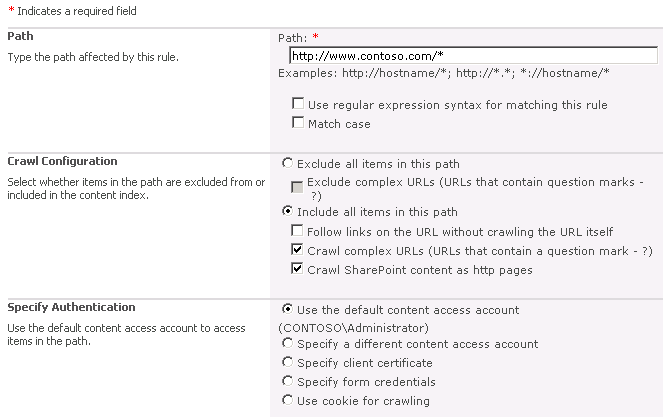
The SharePoint connector indexes the content of the Pages library but it ignores “complex URLs” meaning that it ignores URLs that contain query string parameters. The fix is simple – create a Crawl Rule in Central Administration and make sure that the fields are configured as follows:
Path: http://hostname/*
Crawl Configuration: Include all items in this path
Crawl comlex URLs
Crawl SharePoint content as http pages
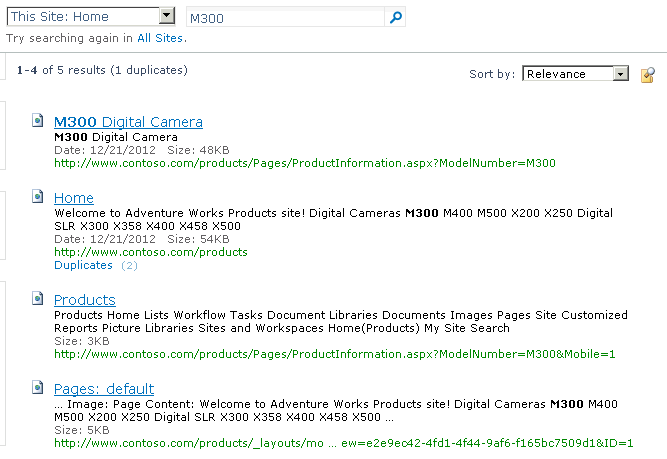
Run a Full Crawl after adding the crawl rule and the dynamic page content should now be searchable.
Example
Let’s say we have a marketing site used to promote a number of different products. We created a single publishing page to show product information for all of the different product models and added the following web part to the page to dynamically set the page title and add product details to the page.
[ToolboxItemAttribute(false)]
public class ProductInformation : WebPart
{
    protected override void CreateChildControls()
    {
        // get the model number from query string
        string modelNumber = Page.Request.QueryString["ModelNumber"];
        if (!string.IsNullOrEmpty(modelNumber))
        {
            // assign a product category based on the model number
            string productCategory = string.Empty;
            switch (modelNumber)
            {
                case "M300":
                case "M400":
                case "M500":
                case "X200":
                case "X250":
                    productCategory = "Digital Camera";
                    break;
                case "X300":
                case "X358":
                case "X400":
                case "X458":
                case "X500":
                    productCategory = "Digital SLR";
                    break;
            }

            // set the page title
            ContentPlaceHolder contentPlaceHolder = (ContentPlaceHolder)Page.Master.FindControl("PlaceHolderPageTitle");
            contentPlaceHolder.Controls.Clear();
            contentPlaceHolder.Controls.Add(new LiteralControl() { Text = string.Format("{0} {1}", modelNumber, productCategory) });

            // add the model number and product category to the page as an H2 heading
            Controls.Add(new LiteralControl() { Text = string.Format("<h2>{0} {1}</h2>", modelNumber, productCategory) });
        }
    }
}
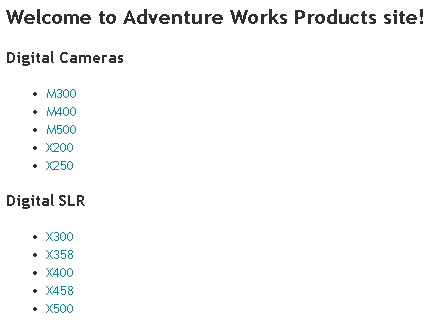
There’s also a static rollup page with a link to each product information page.
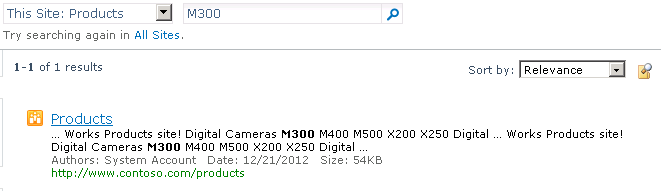
We run a full crawl using a SharePoint connector and search the site for one of the product model numbers. All we get back is a single result to the rollup page.
Navigate to Central Administration > Search Service Application > Crawl Rules and create a new crawl rule using the settings below.
Run another full content crawl and then search the site for the same product model number used previously. This time the product information page is included in the search results.